Angular Universal Example: Server Side Rendering (SSR), Prerender

Node.js (with npm included) is required. You can download the latest version from the following link.
Open your terminal and install the Angular CLI by running the following command:
npm install -g @angular/cliYou can now execute from your workspace directory the following command to generate your Angular web app:
ng new <your-app-name>You can test your generated app by executing:
cd <your-app-name>
ng serve
Your app will be accessible locally from http://localhost:4200.


In this example, we will implement a miniature version of the current website.
Let's start by creating the Home and Article components to display the pages data:
ng generate component home
ng generate component article
We also need to generate an Articles service to retrieve the pages data:
ng generate service articlesHttpClient
As the app will communicate with a backend service using HTTP, HttpClientModule have to be imported to use the HttpClient service:
app.module.ts
import { HttpClientModule } from '@angular/common/http';
import { NgModule } from '@angular/core';
import { BrowserModule } from '@angular/platform-browser';
import { AppRoutingModule } from './app-routing.module';
import { AppComponent } from './app.component';
import { ArticleComponent } from './article/article.component';
import { HomeComponent } from './home/home.component';

@NgModule({
  declarations: [
    AppComponent,
    HomeComponent,
    ArticleComponent
  ],
  imports: [
    BrowserModule,
    AppRoutingModule,
    HttpClientModule
  ],
  providers: [],
  bootstrap: [AppComponent]
})
export class AppModule { }
The Articles service is used to retrieve all the articles data from an external API.
articles.service.ts
import { HttpClient } from '@angular/common/http';
import { Injectable } from '@angular/core';
import { Article, ArticleCard } from './model/article';

@Injectable({
  providedIn: 'root',
})
export class ArticlesService {
  apiBase = 'https://simply-how.herokuapp.com';
  articleCardsPath = '/article-cards';
  articlesPath = '/articles';

  constructor(private http: HttpClient) {}

  getArticle(id: string) {
    return this.http.get<Article>(`${this.apiBase}${this.articlesPath}/${id}`);
  }

  getArticleCards() {
    return this.http.get<ArticleCard[]>(
      `${this.apiBase}${this.articleCardsPath}`
    );
  }
}
The article definition data will be defined in src/app/model/article.d.ts
export interface Article extends ArticleCard {
  description: string;
  cover: Image;
}

export interface ArticleCard {
  title: string;
  slug: string;
}

export interface Image {
  src: string;
  alt: string;
}
Routing
The app will use routing to navigate between the home page and article pages. We have to define the routes using the RouterModule:
app-routing.module.ts
import { NgModule } from '@angular/core';
import { RouterModule, Routes } from '@angular/router';
import { ArticleComponent } from './article/article.component';
import { HomeComponent } from './home/home.component';


const routes: Routes = [
  { path: '', component: HomeComponent },
  { path: ':id', component: ArticleComponent }
];

@NgModule({
  imports: [RouterModule.forRoot(routes)],
  exports: [RouterModule]
})
export class AppRoutingModule { }
The app component will contain the router-outlet directive that defines where the router should display the components.
app.component.html
<!-- Toolbar -->
<div class="toolbar" role="banner">
  <a routerLink="">
    <img width="40" alt="Angular Logo"
      src="data:image/svg+xml;base64,PHN2ZyB4bWxucz0iaHR0cDovL3d3dy53My5vcmcvMjAwMC9zdmciIHZpZXdCb3g9IjAgMCAyNTAgMjUwIj4KICAgIDxwYXRoIGZpbGw9IiNERDAwMzEiIGQ9Ik0xMjUgMzBMMzEuOSA2My4ybDE0LjIgMTIzLjFMMTI1IDIzMGw3OC45LTQzLjcgMTQuMi0xMjMuMXoiIC8+CiAgICA8cGF0aCBmaWxsPSIjQzMwMDJGIiBkPSJNMTI1IDMwdjIyLjItLjFWMjMwbDc4LjktNDMuNyAxNC4yLTEyMy4xTDEyNSAzMHoiIC8+CiAgICA8cGF0aCAgZmlsbD0iI0ZGRkZGRiIgZD0iTTEyNSA1Mi4xTDY2LjggMTgyLjZoMjEuN2wxMS43LTI5LjJoNDkuNGwxMS43IDI5LjJIMTgzTDEyNSA1Mi4xem0xNyA4My4zaC0zNGwxNy00MC45IDE3IDQwLjl6IiAvPgogIDwvc3ZnPg==" />
  </a>
</div>

<div class="content" role="main">
  <router-outlet></router-outlet>
</div>
app.component.css
.toolbar {
  position: absolute;
  top: 0;
  left: 0;
  right: 0;
  height: 60px;
  display: flex;
  align-items: center;
  background-color: #1976d2;
}

.toolbar img {
  margin: 0 16px;
}

.content {
  display: flex;
  margin: 82px auto 32px;
  padding: 0 16px;
  max-width: 960px;
  flex-direction: column;
  align-items: center;
}
Home component
The home component will list all the article links.
home.component.ts
import { Component, OnInit } from '@angular/core';
import { ArticlesService } from '../articles.service';
import { ArticleCard } from '../model/article';

@Component({
  selector: 'app-home',
  templateUrl: './home.component.html',
  styleUrls: ['./home.component.css'],
})
export class HomeComponent implements OnInit {
  articleCards: ArticleCard[];

  constructor(private articlesService: ArticlesService) {}

  ngOnInit(): void {
    this.articlesService.getArticleCards().subscribe((cards) => {
      this.articleCards = cards;
    });
  }
}
home.component.html
<div *ngFor="let card of articleCards">
    <p><a routerLink="/{{card.slug}}">{{card.title}}</a></p>
</div>
*ngFor is used to iterate over the articleCards array and render a link for every one of them.
Article component
The Article component will display the title, the cover image and the description.
Navigating to the home page is possible by clicking on the Angular logo of the toolbar.
article.component.ts
import { Component, OnInit } from '@angular/core';
import { ActivatedRoute } from '@angular/router';
import { ArticlesService } from '../articles.service';
import { Article } from '../model/article';

@Component({
  selector: 'app-article',
  templateUrl: './article.component.html',
  styleUrls: ['./article.component.css'],
})
export class ArticleComponent implements OnInit {
  article: Article;

  constructor(
    private route: ActivatedRoute,
    private articlesService: ArticlesService
  ) {}

  ngOnInit(): void {
    this.route.paramMap.subscribe((params) => {
      const id = params.get('id');
      this.articlesService.getArticle(id).subscribe((article) => {
        this.article = article;
      });
    });
  }
}
article.component.html
<article *ngIf="article">
    <h1>{{article.title}}</h1>

    <a [href]="'https://simply-how.com/' + article.slug" target="_blank">
        <div class="cover-image">
            <img [alt]="article.cover.alt" [src]="article.cover.src" />
        </div>
    </a>

    <p>{{article.description}}</p>
</article>
*ngIf is used to render the structure only after the article was retrieved, which is when article will no longer be null or false.
article.component.css
h1 {
    text-align: center;
}

.cover-image {
    display: grid;
    height: 100%;
}

.cover-image img {
    max-width: 500px;
    max-height: 100vh;
    margin: auto;
}


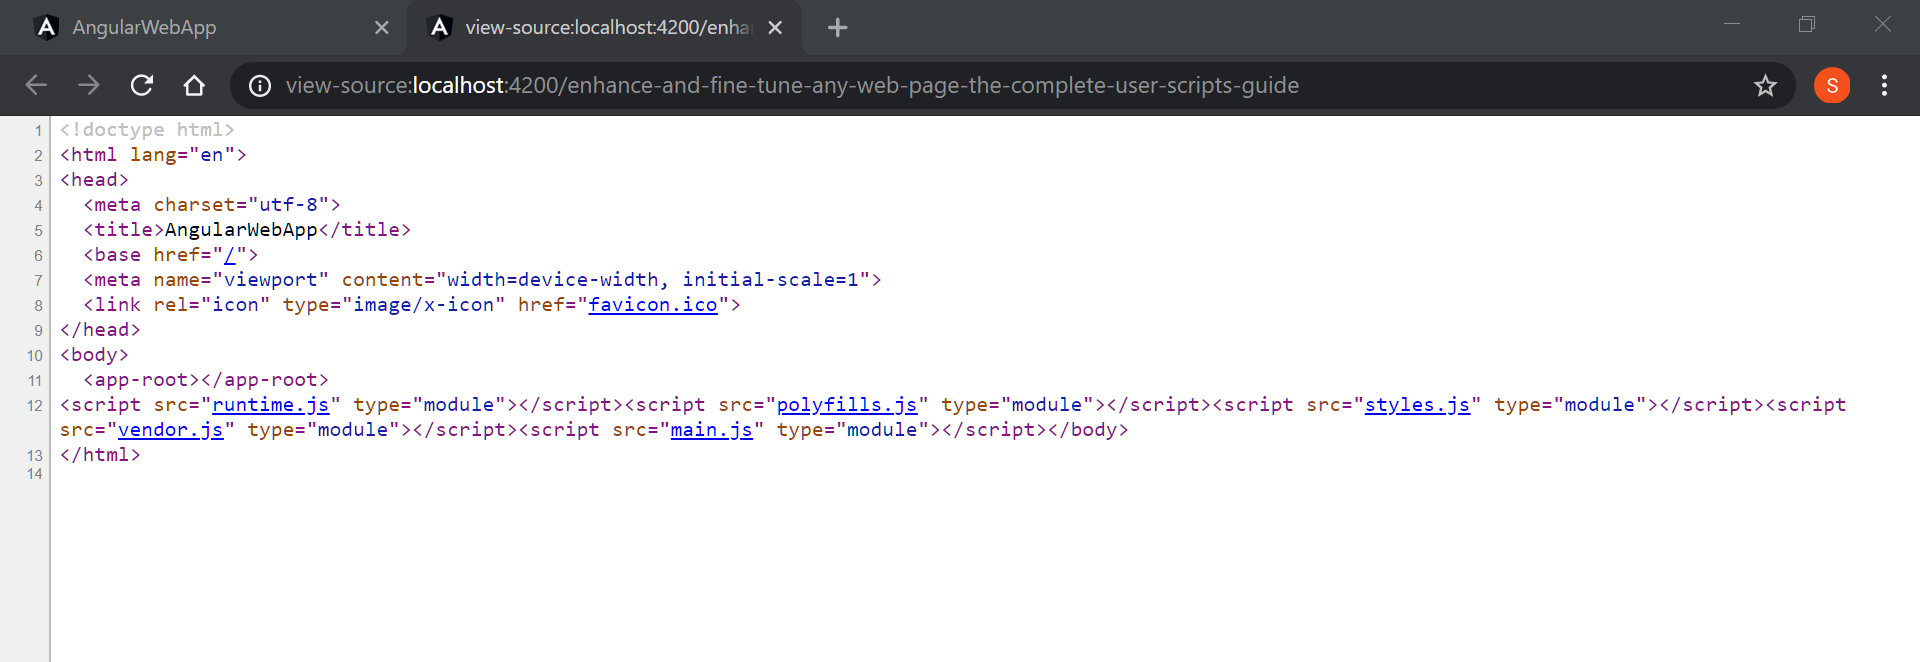
The currently implemented Angular app is rendered in the browser, which means that when a user loads the page:
- The HTML document he receives is the empty
index.htmlpage skeleton - Angular will initialize, then will construct the final article/home page after fetching and rendering the article data.
This is not very practical for many reasons:
- Poor search engine optimization (SEO)
- Low performance on mobile and low-powered devices
- More delayed first-contentful paint (FCP)
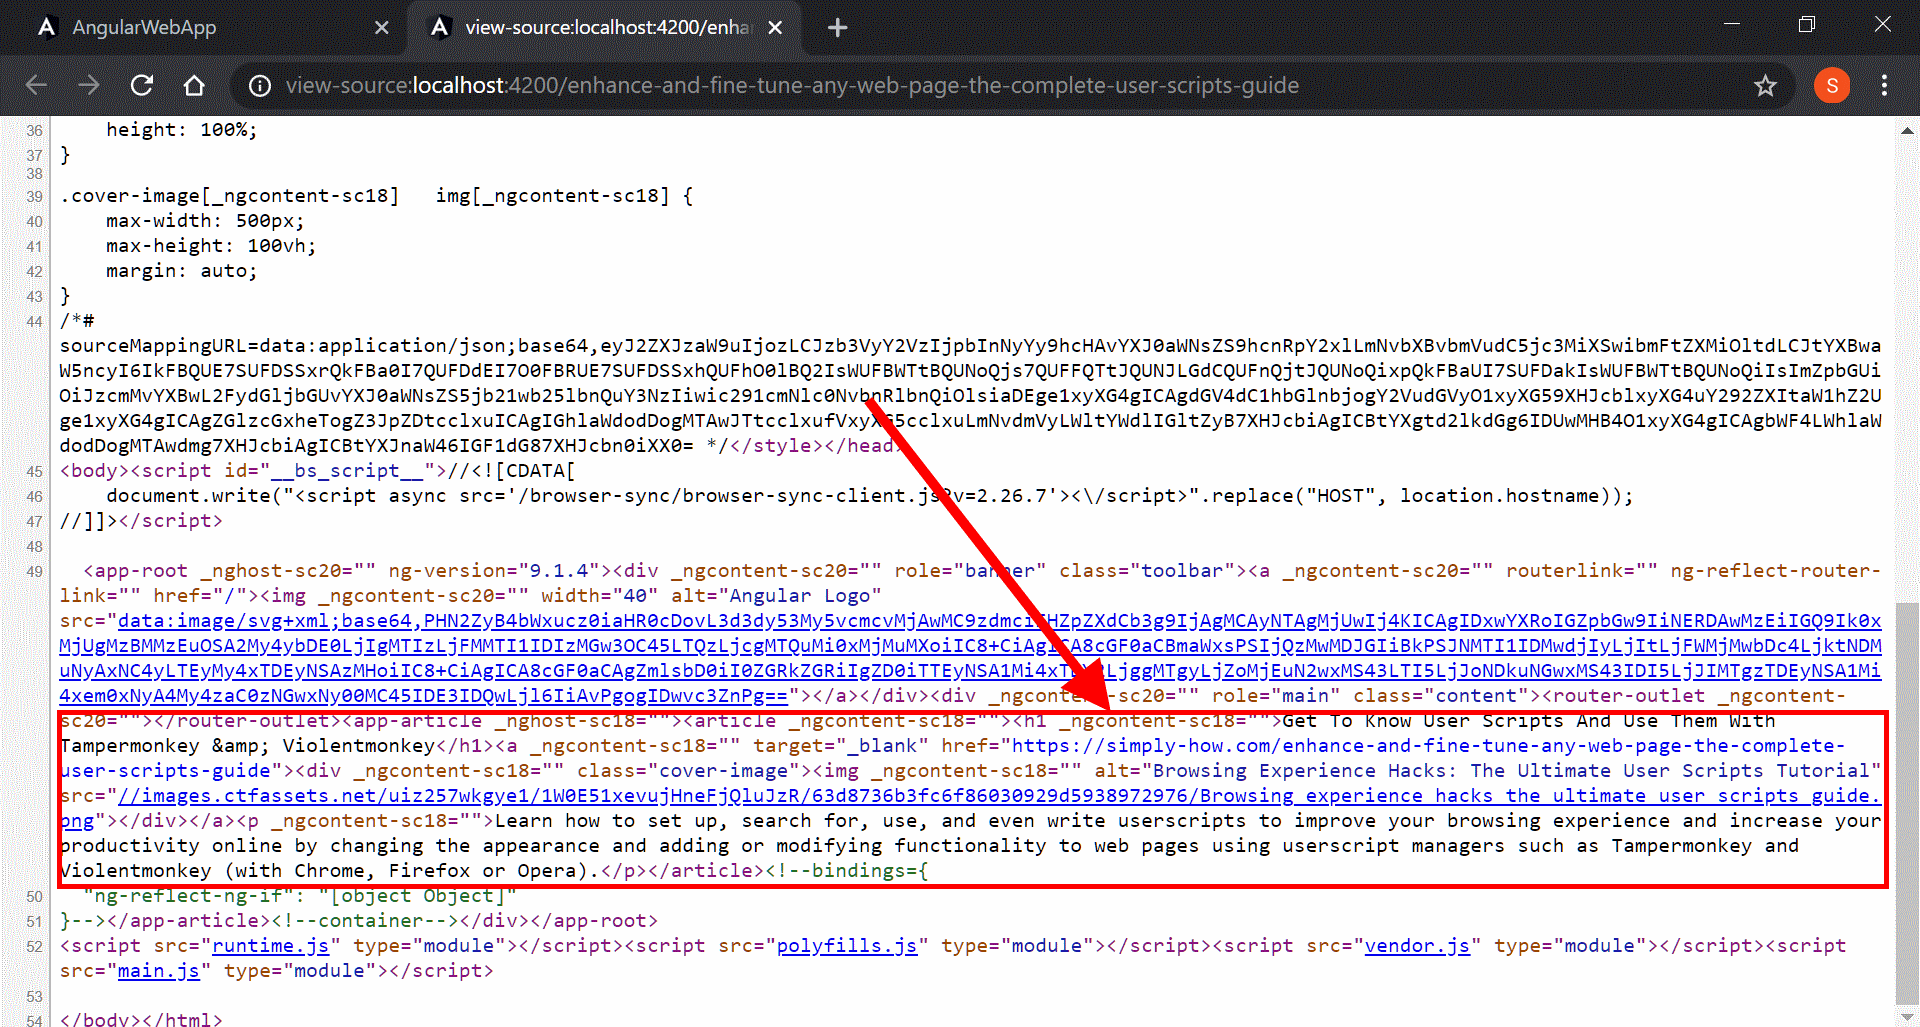
Server-side rendering is a technique that helps improve all the 3 cited limitations by fetching all the data then rendering the page on the server. The user will already receive an HTML page skeleton that contains article data.
Angular Universal is the most adopted technology that allows Angular web apps to be server-side rendered.
Getting started with Angular Universal
To convert the current project to Angular Universal with Express as it's rendering engine, execute:
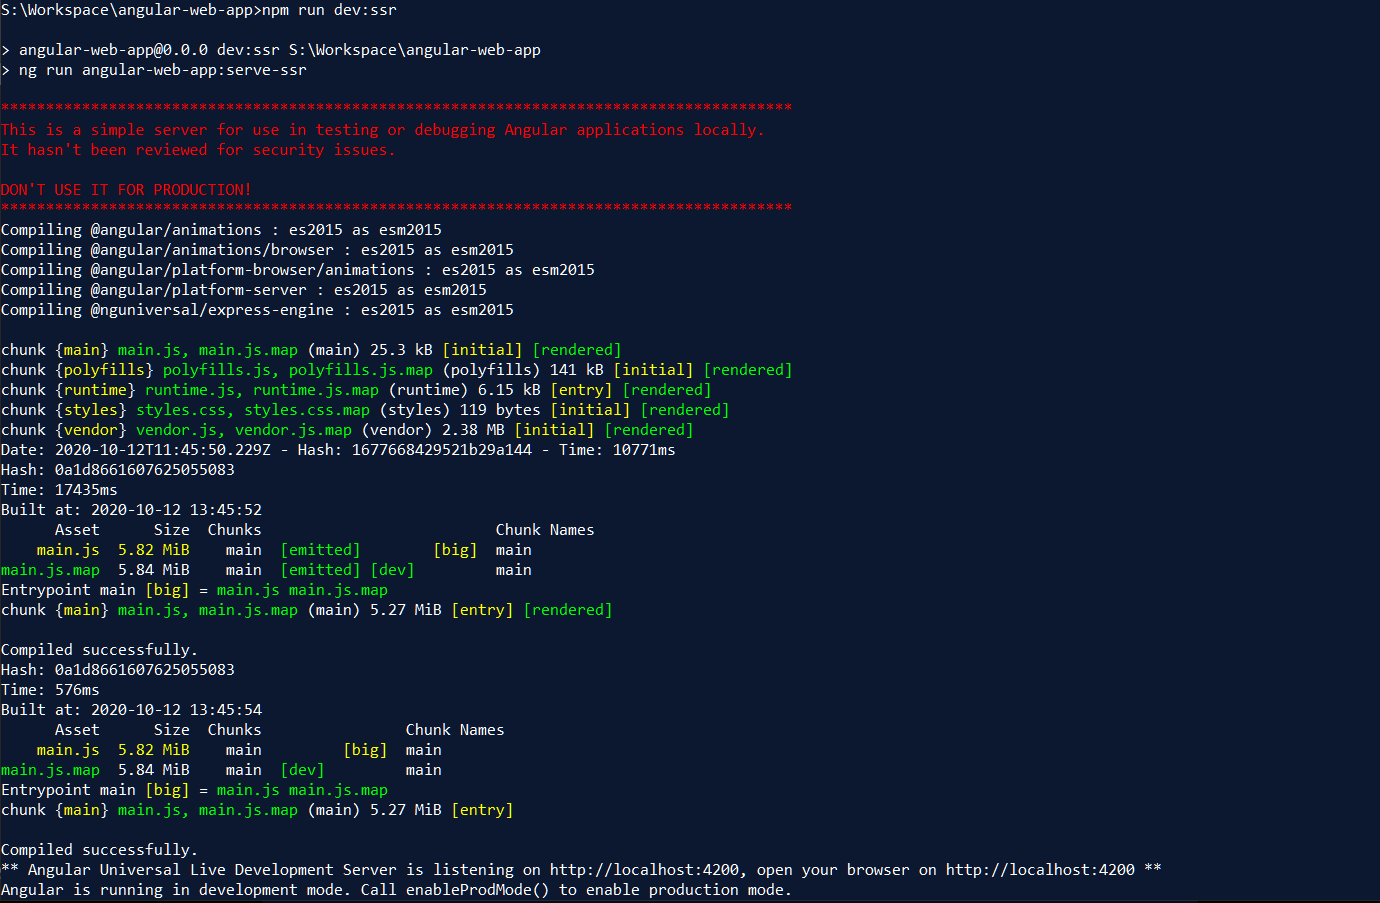
ng add @nguniversal/express-engineYou can now start testing your Angular app's server-side rendering with the following command:
npm run dev:ssrKeep in mind that there are many limitations when using Angular Universal. For example the window and document objects are not defined in a server context. But you can always limit some functionality to be used only on the server or on the browser. The following page has a comprehensive list of Universal limitations and how to work around them.
Production use
When the project migrated to Angular Universal, a server.ts file was generated.
This file contains a minimal server implementation for rendering and serving an Angular Universal app using the Express framework in a Node.js runtime.
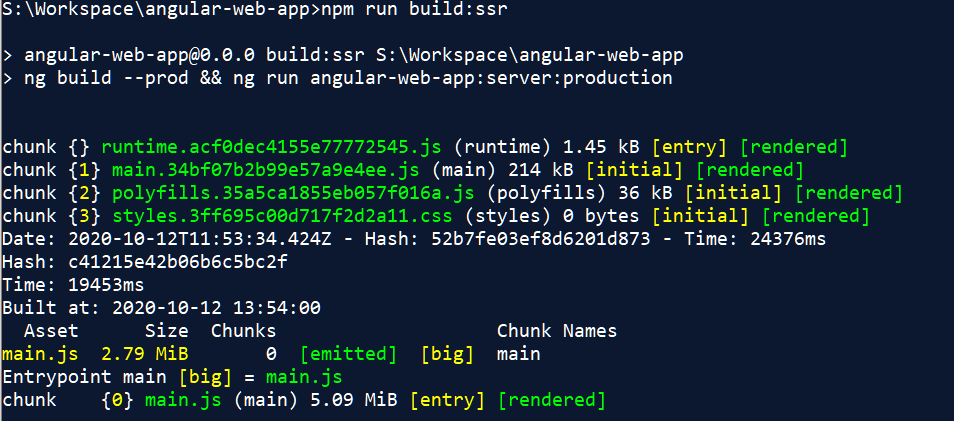
To build your Angular Universal app and server for production use, run:
npm run build:ssrThe main entry for the Express server app is located in dist/<your-app-name>/server/main.js.
You can launch it locally by running:
npm run serve:ssrThe app will be accessible locally from the 4000 port.
You can also use other server side frameworks and runtime environments to deploy and serve your app, or even a use a content delivery network to deliver directly your generated static files. The next section will demonstrate how you could achieve that with the help of prerendering.

When the project migrated to Angular Universal, a prerender npm script was generated in the project's package.json.
If we try to execute it, only the home page will be pre-rendered.
That's because the current app uses dynamic routes: the page ids are unknown without manually calling an external service. That's why we will need the following prerendering solution.
Prerender Node.js script
In order to generate all the article pages, we will make use of the generated Express server.
We will also need to query all the article ids. The node-fetch Node.js library will help us make HTTP requests with Promise support (in order to use async/await):
npm install --save-dev node-fetch
npm install --save-dev @types/node-fetch
This is an implementation example of the pre-rendering script:
prerender.ts
import { Express } from 'express';
import { existsSync, mkdirSync, writeFile } from 'fs';
import fetch from 'node-fetch';
import { join } from 'path';

const app: Express = require('./main').app();

const OUTPUT_FOLDER = join(process.cwd(), 'dist/prerender');
if (!existsSync(OUTPUT_FOLDER)) {
  mkdirSync(OUTPUT_FOLDER);
}

const port = process.env.PORT || 5000;
const expressBaseUrl = `http://localhost:${port}`;
const server = app.listen(port, async () => {
  console.log('Server launched');
  await prerenderPages();
  server.close(() => {
    console.log('Server closed');
  });
});

async function prerenderPages() {
  const articleCards = await fetch(
    'https://simply-how.herokuapp.com/article-cards'
  ).then((res) => res.json());
  const articleIds: string[] = articleCards.map((a) => a.slug);
  console.log(`Prerendering ${articleIds.length} pages ...`);
  await Promise.all(articleIds.map(prerenderPage));
}

async function prerenderPage(articleId) {
  const pageOutputPath = join(OUTPUT_FOLDER, articleId + '.html');
  const response = await fetch(`${expressBaseUrl}/${articleId}`);
  if (response.status === 200) {
    writeFile(pageOutputPath, await response.text(), (err) => {
      if (err) {
        throw err;
      }
    });
  } else {
    throw Error(`Received page not ok: /${articleId} - ${response.status}`);
  }
}
To build the prerender script, this TypeScript configuration file can be used:
tsconfig.prerender.json
{
  "extends": "./tsconfig.json",
  "compilerOptions": {
    "outDir": "./dist/<your-app-name>/server",
    "module": "commonjs",
    "types": ["node"]
  },
  "files": ["prerender.ts"]
}
Create/replace the following npm scripts in the package.json file:
{
  "scripts": {
    // ...
    "build:prerender": "tsc -p tsconfig.prerender.json",
    "prerender": "node dist/<your-app-name>/server/prerender.js"
  }
}
We can now build and launch the prerendering by executing the following commands:
npm run build:prerender
npm run prerender
The pre-rendered HTML pages will be generated in the dist/prerender folder.
Next steps
Now that we pre-rendered the pages, we can either:
- Use a content delivery network (CDN) or a static hosting service to deliver your app such as Firebase and Netlify.
- Customize the Node.js server or use an alternative framework and runtime environnement then deploy a dynamic web app using a Platform as a Service (PaaS). If you need a PaaS with a free tier, checkout this guide.


