Getting Started With Java 11 (If You Are Still Using Java 8)

Key features and changes since Java 8
Java 9
- The Java Platform Module System introduces a new kind of Java programing component, the module, which is a named, self-describing collection of code and data. The JDK itself has been divided into a set of modules
- The jlink tool is used to assemble modules and their dependencies into a reduced runtime package, and perform optimizations during the new
link timephase after thecompile timephase - jshell is a Read-Eval-Print Loop (REPL) tool for the Java platform. Can be used to interactively evaluate input code and print the results
- Multi-Release JAR Files: Enables multiple, Java release-specific versions of class files to coexist in a single archive
- Private methods can be defined in interfaces. They can be used for example by the default methods of an interface to refactor code
- Introduction of the Reactive Streams compliant Flow API
- Factory methods for collections, such as
Set.ofandList.of - G1 is made the default garbage collector
Java 10
Local-Variable Type Inference using the keyword
var, a way to automatically deduce the type of a local variable without declaring it.var set = new HashSet<String>();is now a valid expression.A new method
orElseThrowhas been added to theOptionalclassNew APIs for creating unmodifiable collections such as
List.copyOf,Set.copyOf, andMap.copyOfPerformance optimization for the
G1garbage collector by using a Parallel Full GC
Java 11
- Finalization of the HTTP Client API
- Added the ability to launch single-file source-code programs: useful in the early stages of learning Java, and when writing utility programs
- Local-Variable Syntax for Lambda Parameters: The
varkeyword can be used when declaring the formal parameters of implicitly typed lambda expressions - Removed modules that contain CORBA and Java EE technologies such as JAX-WS and JAXB
- Flight Recorder: A profiling and monitoring tool with a very low-overhead used to record events originating from Java applications and the OS
JDK Installation
Java is now developed as OpenJDK. Most JDK binaries are based on the OpenJDK codebase, including the Oracle JDK.
Production-ready builds of JDK 11 can be downloaded from the following sources:
Eclipse Temurin (Eclipse Adoptium project, the continuation of the AdoptOpenJDK project): Provides prebuilt OpenJDK binaries using an open source build & test infrastructure, for more than 7 platforms (such as Linux, Windows, macOS, and Docker) with either the HotSpot or OpenJ9 JVM.
Azul Zulu: provides community as well as enhanced and certified builds of OpenJDK for a wide array of platforms.
Red Hat OpenJDK: OpenJDK builds by Red Hat.
Oracle JDK: Commercial Oracle branded builds of the JDK. Free for development use, but not in production.
Particularly designed to maximize developer productivity, it's currently the Java IDE of choice. You can download either the community version which is free, or the Ultimate version that requires a license. Java 11 support was added starting from the 2018.2 version.
This tutorial will be using IntelliJ IDEA 2021.2.1 (Community Edition).
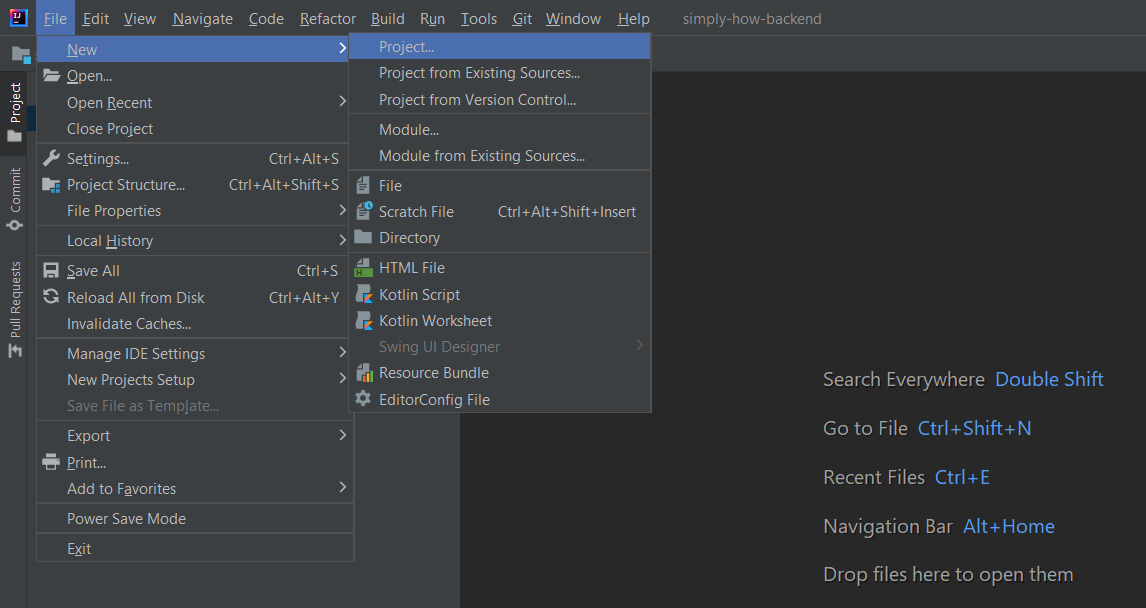
To create and run your Java 11 project using IntelliJ IDEA:
From the top bar, select File -> New -> Project
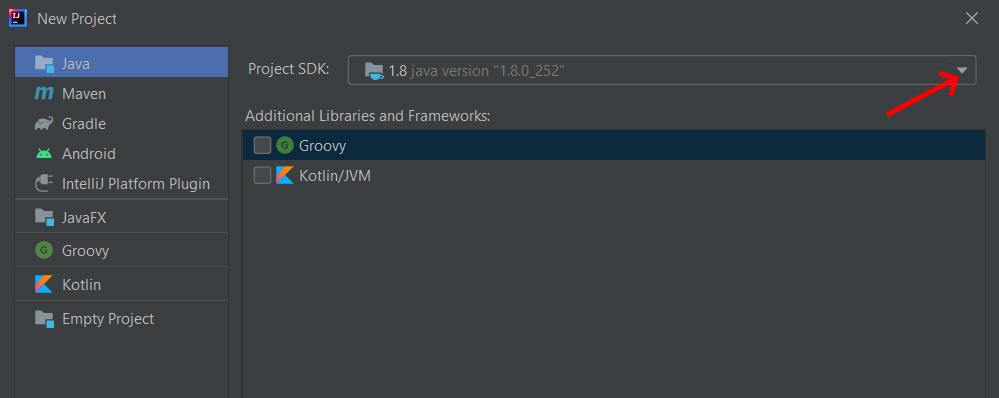
Open the
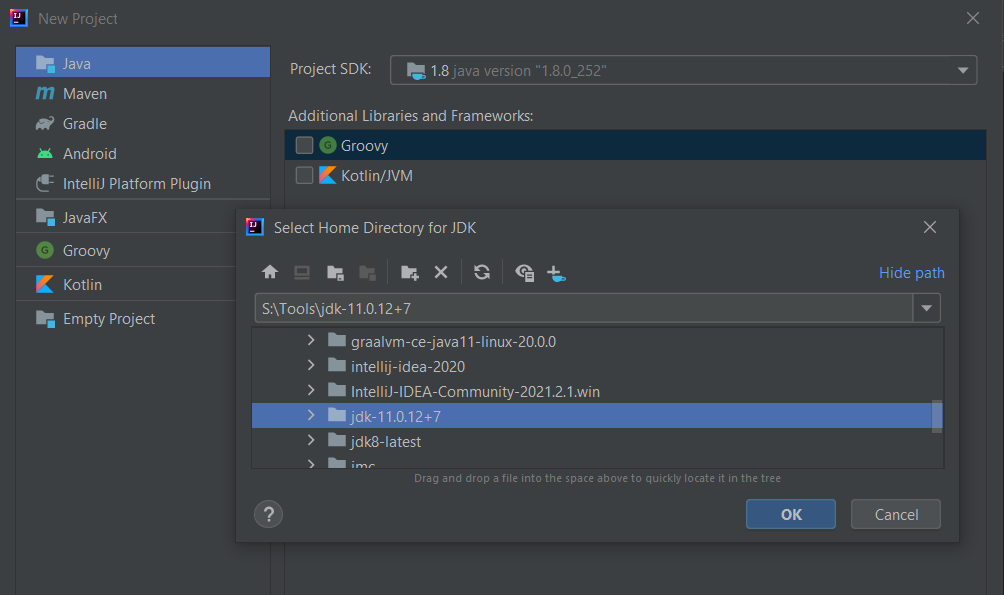
Project SDKdrop-down list, then clickAdd JDK...Select the installed JDK 11, then click on
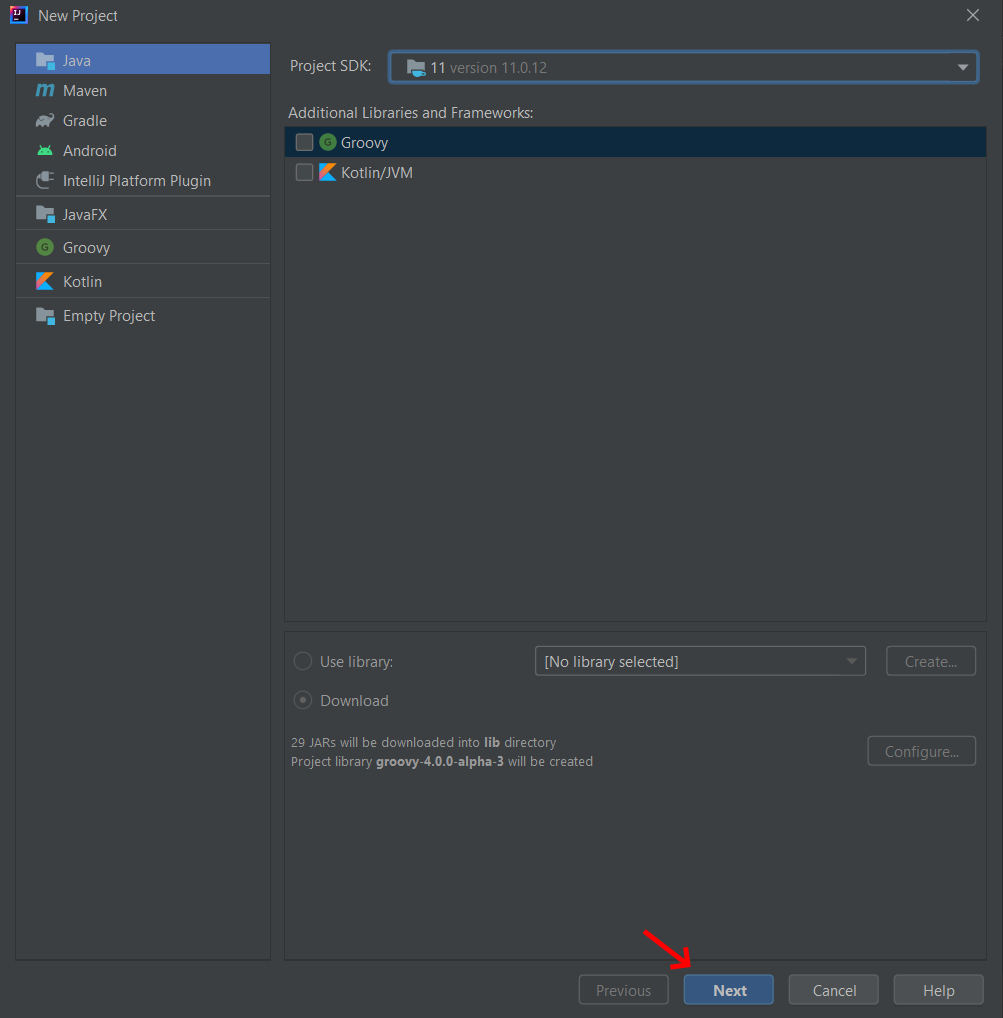
OKClick on
NextCheck
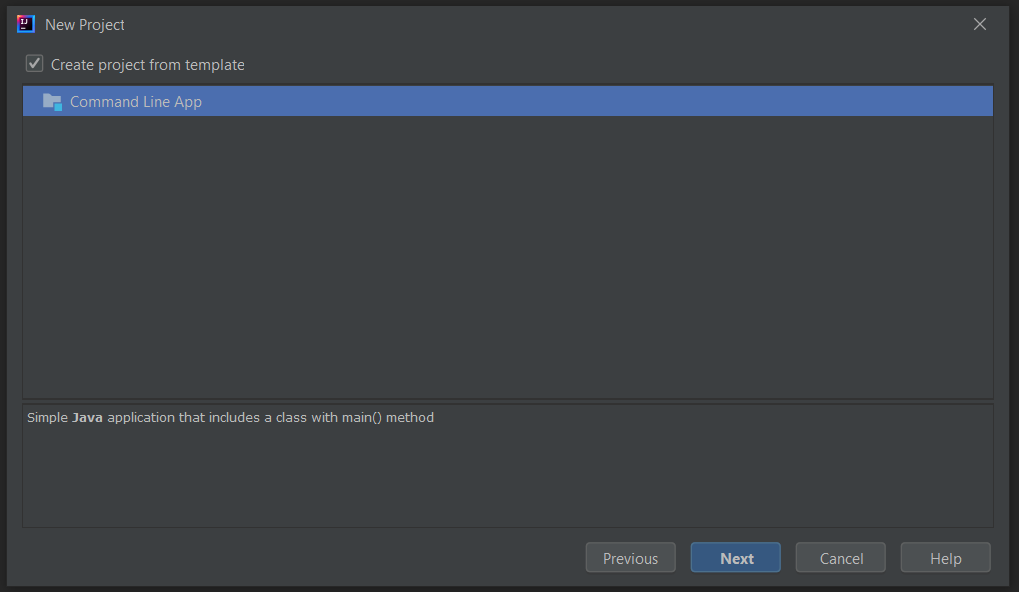
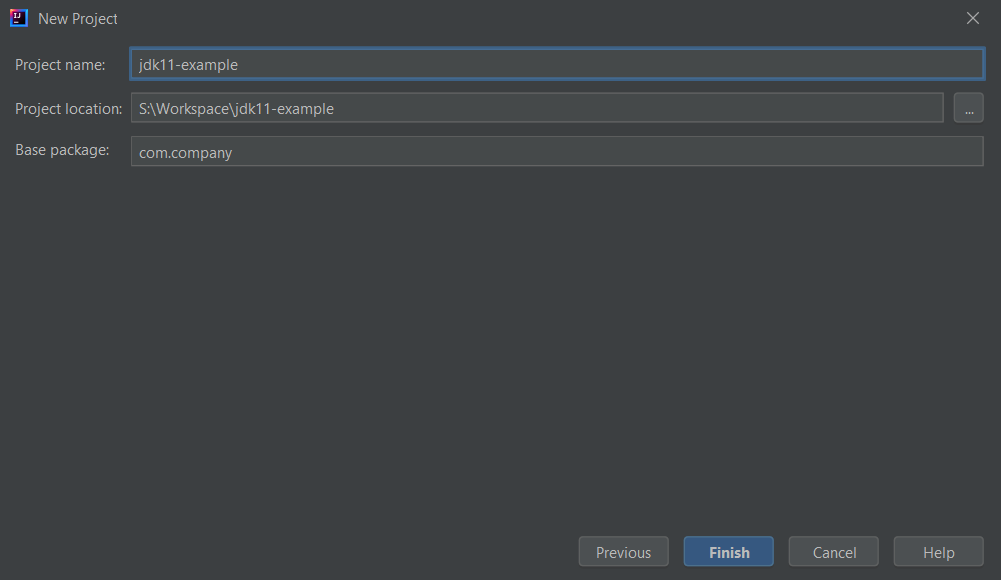
Create project from templateand selectCommand Line App, then click onNextEnter your project's name and location, then click on
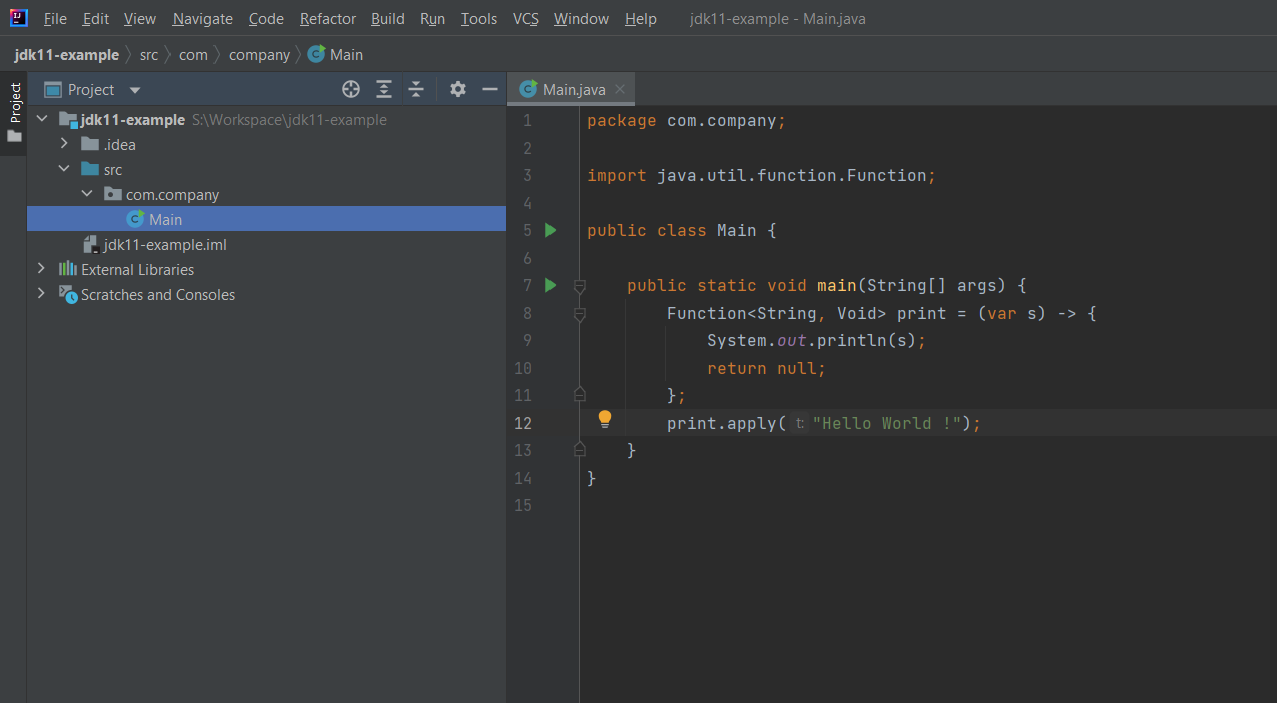
FinishOpen your Main class and replace your main method's body with:
Function<String, Void> print = (var s) -> {
    System.out.println(s);
    return null;
};
print.apply("Hello World !");
Import the
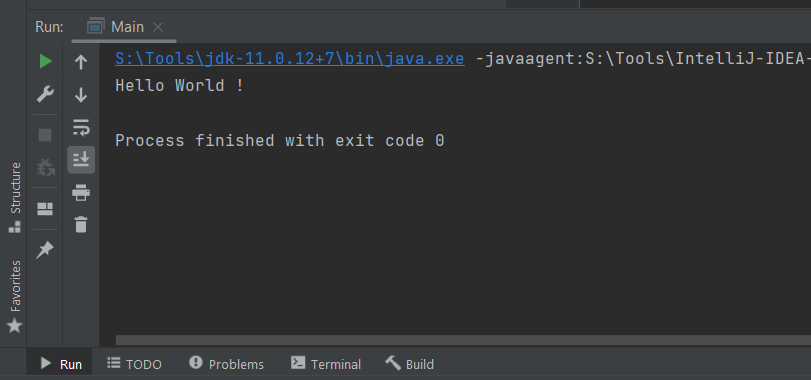
Functionclass:import java.util.function.Function;Run the project (click on the green arrow, then select
Run 'Main.main()').
Hello World ! should be printed on the console.
Currently the most widely used Java IDE, it's developed by the Eclipse Foundation, the new home of Jakarta EE formerly known as Java EE. It's completely free to download and use. Out-of-the-box Java 11 support was added starting from the 2018-12 release.
To create and run your Java 11 project using Eclipse:
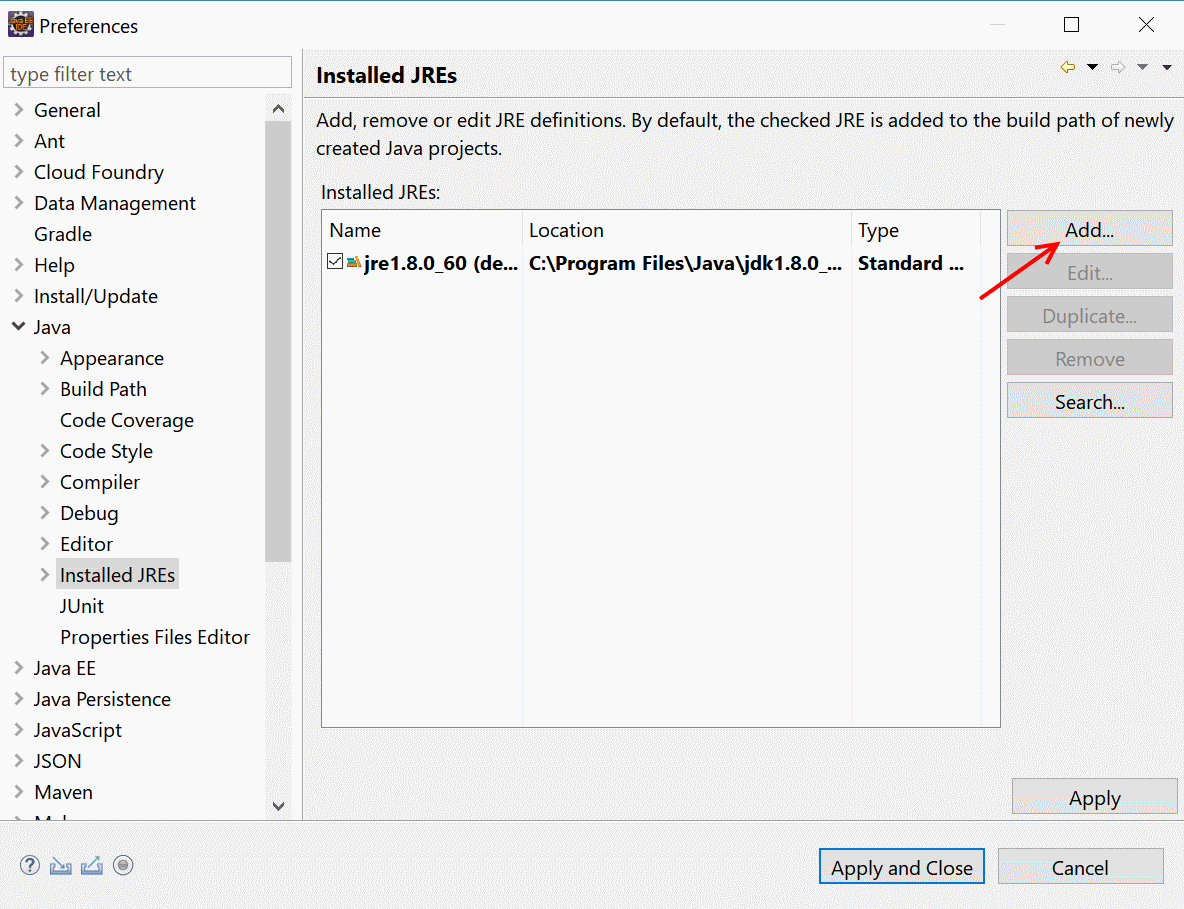
From the top bar, select Window -> Preferences -> Java -> Installed JREs, then click on
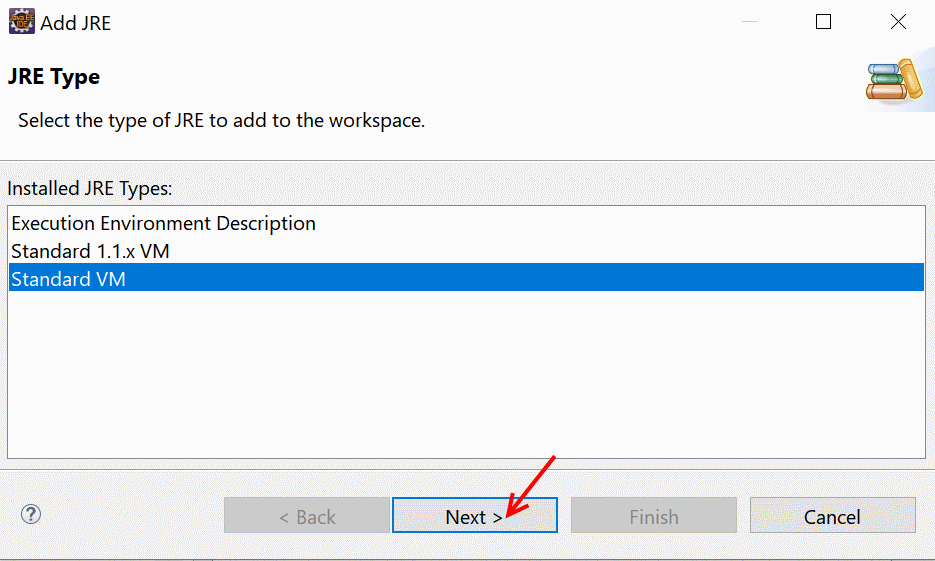
Add...Keep
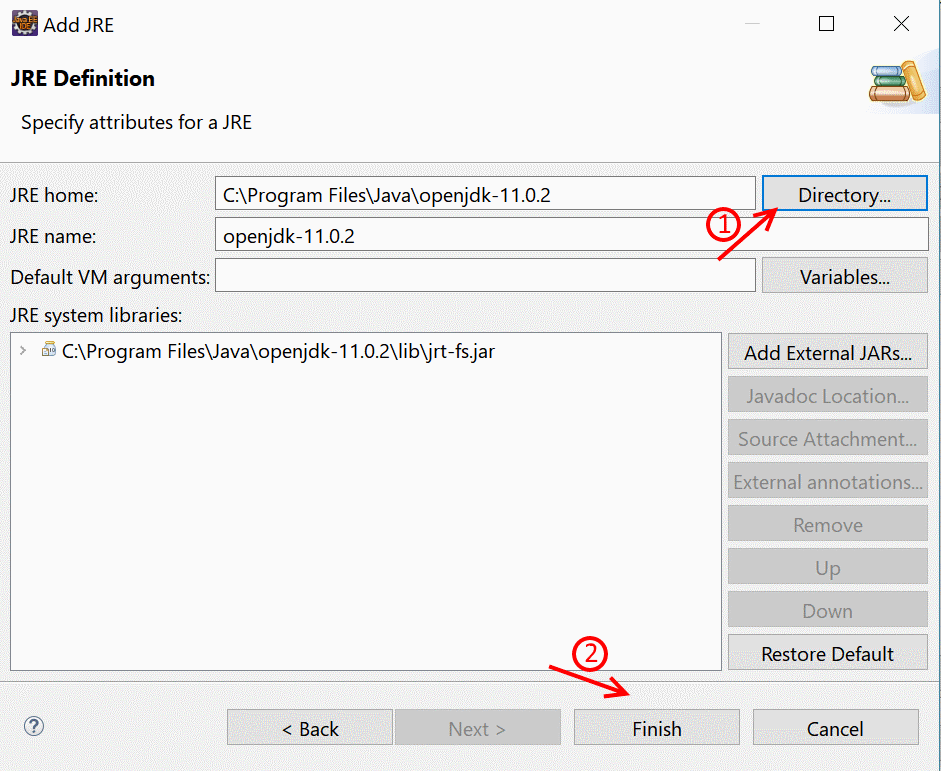
Standard VMselected, then click onNext >Browse and select your JDK installation folder by clicking on
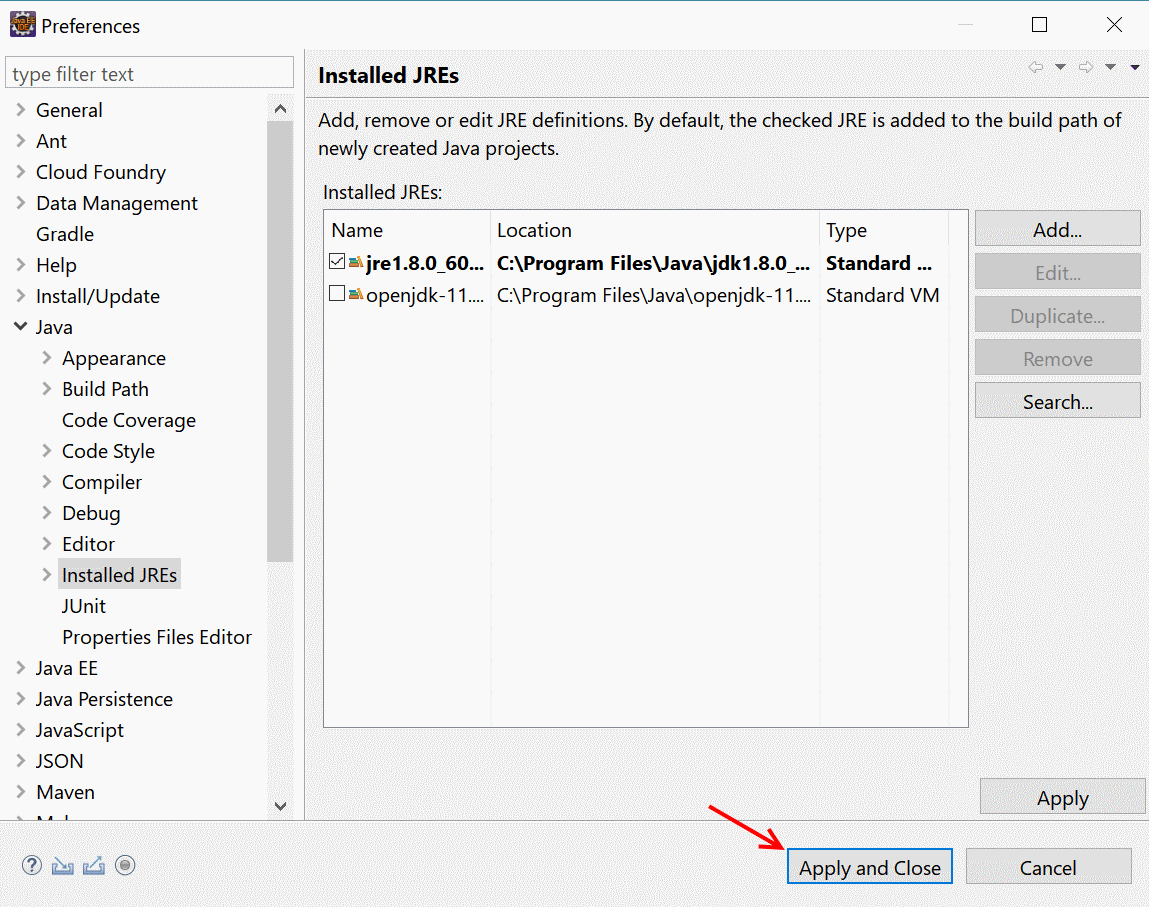
Directory, then click onFinishClick on
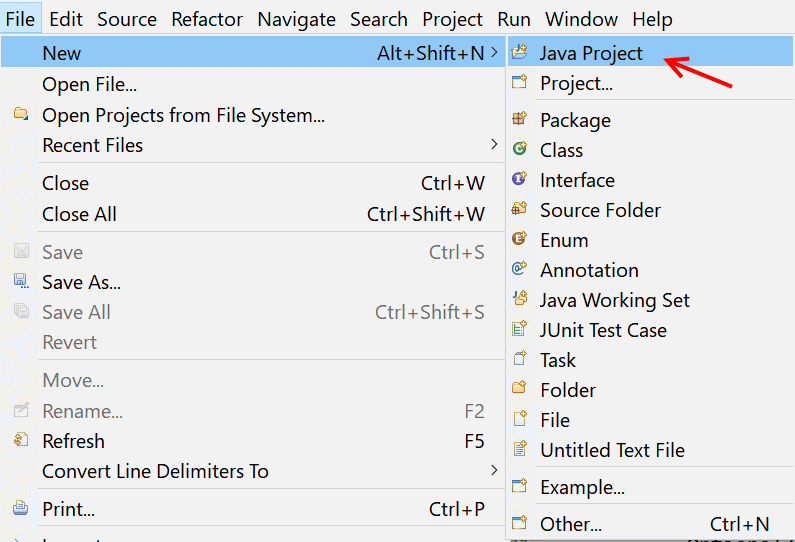
Apply and CloseFrom the top bar, select File -> New -> Java Project
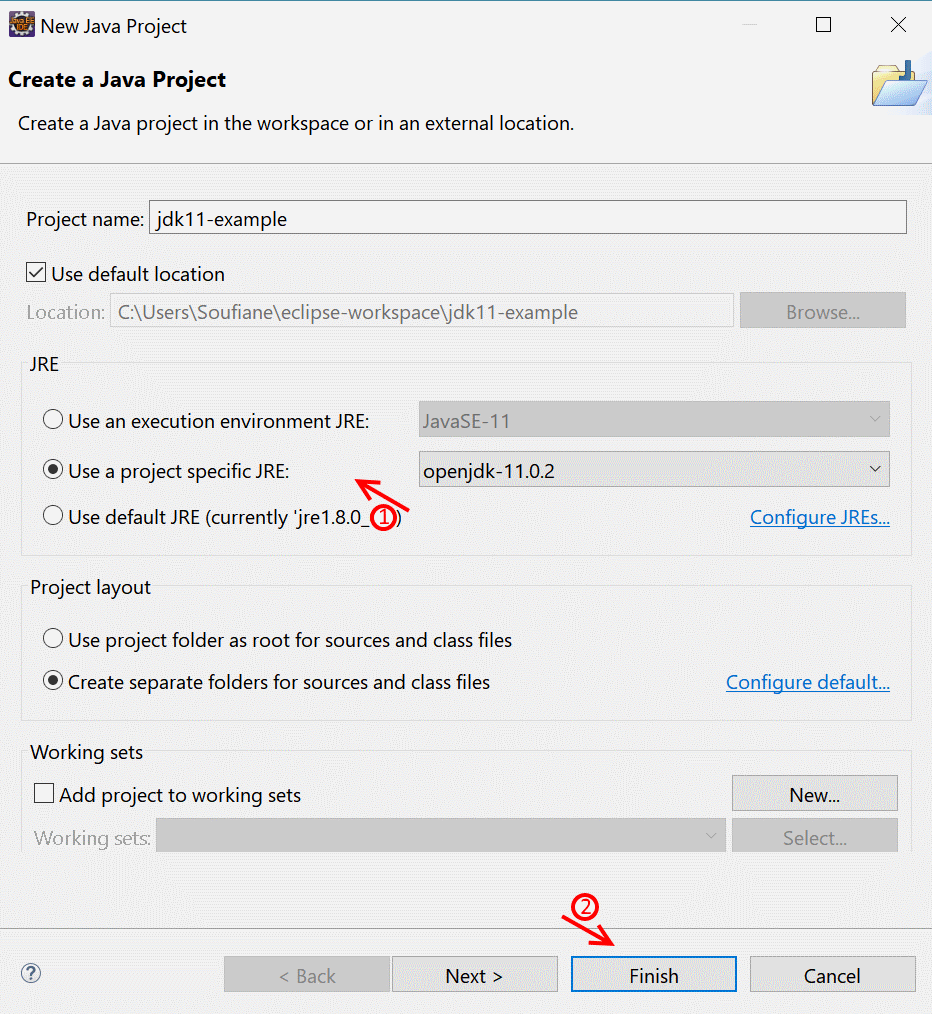
Enter your project name and select the installed JDK 11, then click on
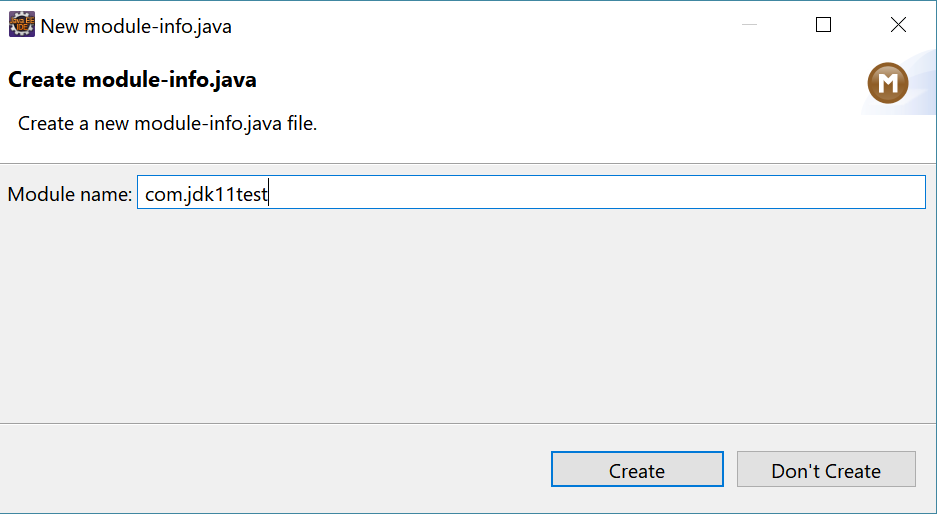
FinishEnter your module name
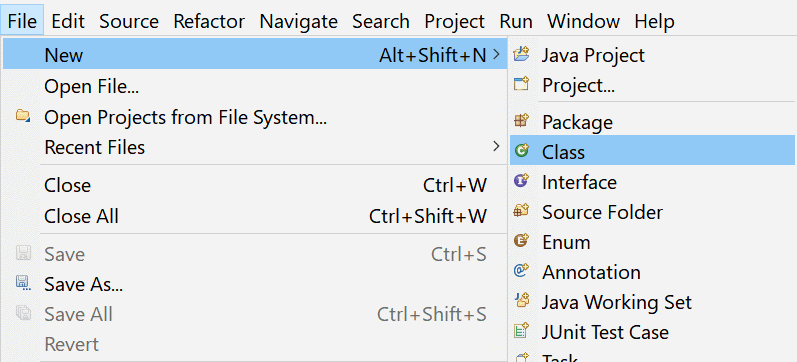
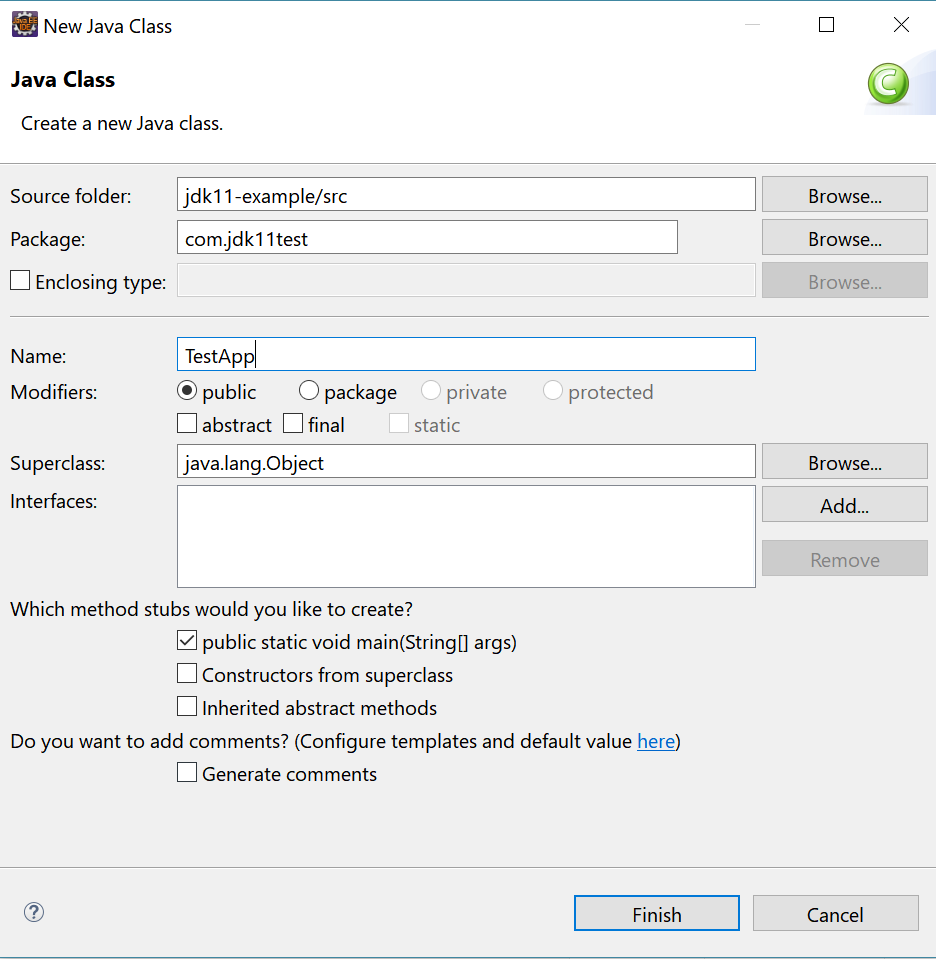
Create the main class
Fill the class name and check
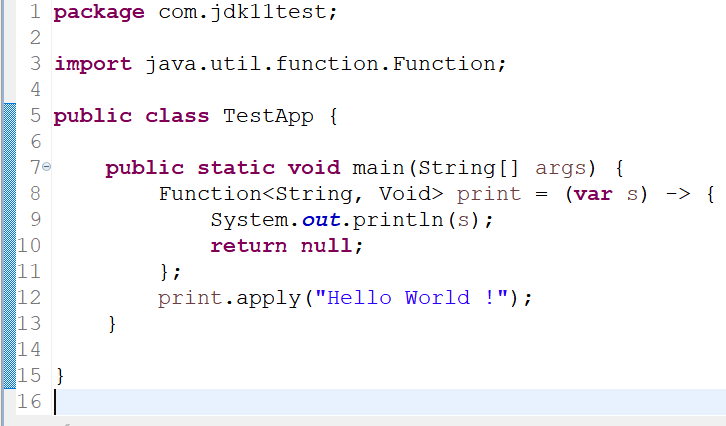
public static void main(String[] args)Paste the following code to your main method:
Function<String, Void> print = (var s) -> {
    System.out.println(s);
    return null;
};
print.apply("Hello World !");
Import the
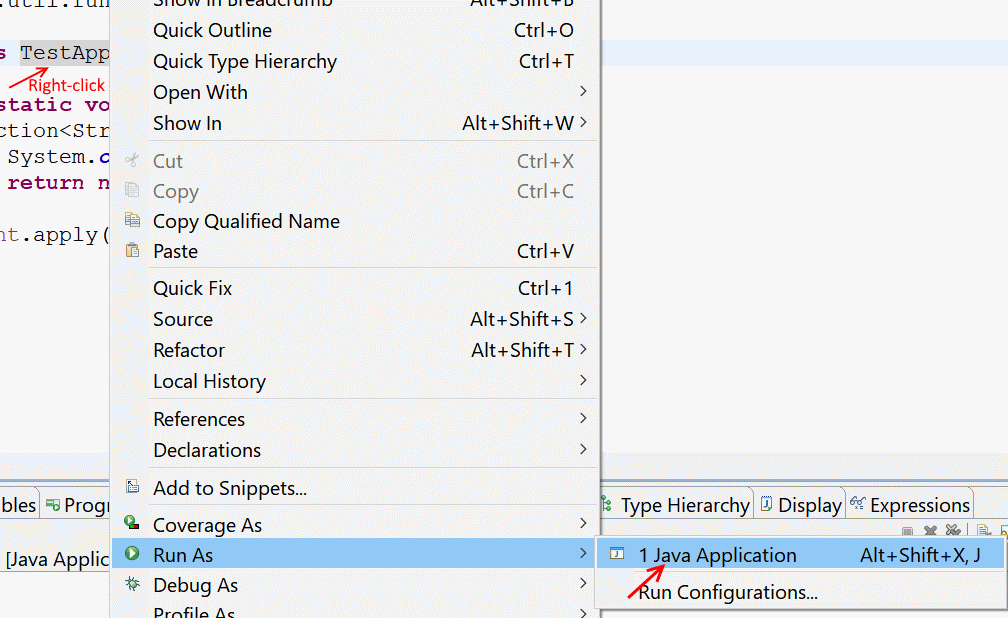
Functionclass:import java.util.function.Function;Run the project (right-click on the class name, then select Run As -> Java Application)
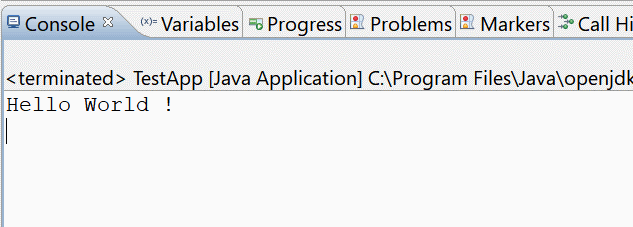
Hello World ! should be printed on the console.
Maven
Java 11 is supported by Maven by using at least the 3.8.0 version of the Maven Compiler Plugin.
As you are probably still using Java 8 for the majority of your projects, you don't want to modify the JDK Maven is using just to test out Java 11. You can use the Maven Toolchains Plugin for this purpose:
Create or modify the
toolchains.xmlfile located either at~/.m2/toolchains.xml(user level) or<MAVEN_INSTALL_DIR>/conf/toolchains.xml(global level):<?xml version="1.0" encoding="UTF-8"?> <toolchains> <toolchain> <type>jdk</type> <provides> <version>11</version> </provides> <configuration> <!-- Change with you JDK 11 full path --> <jdkHome>C:\Program Files\Java\openjdk-11.0.2</jdkHome> </configuration> </toolchain> </toolchains>Edit your pom.xml to match the following
maven-compiler-pluginandmaven-toolchains-pluginbuild configuration:<build> <plugins> <plugin> <groupId>org.apache.maven.plugins</groupId> <artifactId>maven-compiler-plugin</artifactId> <version>3.8.0</version> <configuration> <release>11</release> </configuration> </plugin> <plugin> <groupId>org.apache.maven.plugins</groupId> <artifactId>maven-toolchains-plugin</artifactId> <version>1.1</version> <configuration> <toolchains> <jdk> <version>11</version> </jdk> </toolchains> </configuration> <executions> <execution> <goals> <goal>toolchain</goal> </goals> </execution> </executions> </plugin> </plugins> </build>Run the project with the command:
mvn compile exec:exec -Dexec.executable="java" -Dexec.args="-classpath %classpath your.main.class"
Gradle
Java 11 is supported by Gradle starting from the 5.0 version.
To test a Java 11 project with gradle:
Add or modify the following properties in your
build.gradle:mainClassName = 'your.main.class' sourceCompatibility = 11 targetCompatibility = 11Run the project using the command:
gradlew run -Dorg.gradle.java.home="/your/jdk11/path"